Salesforce CRM
The Salesforce CRM high performance Glue Connector for AWS Glue simplifies the process of connecting AWS Glue jobs to extract data from Salesforce, and load data into Salesforce. This connector provides comprehensive access to Salesforce data, facilitating cloud ETL processes for operational reporting, data governance, and more.
In this post, we will walk you through a step-by-step configuration to set up Salesforce CRM connector for Glue to Extract, Transform & Load data in Salesforce CRM. You can deploy the Salesforce CRM connector for Glue from the AWS Marketplace.
Let’s start with discussing the prerequisites and then detailing the steps involved.
Versions Available: 1.0.0
Prerequisites
The following prerequisite information should be available handy to start the setup.
Connector options
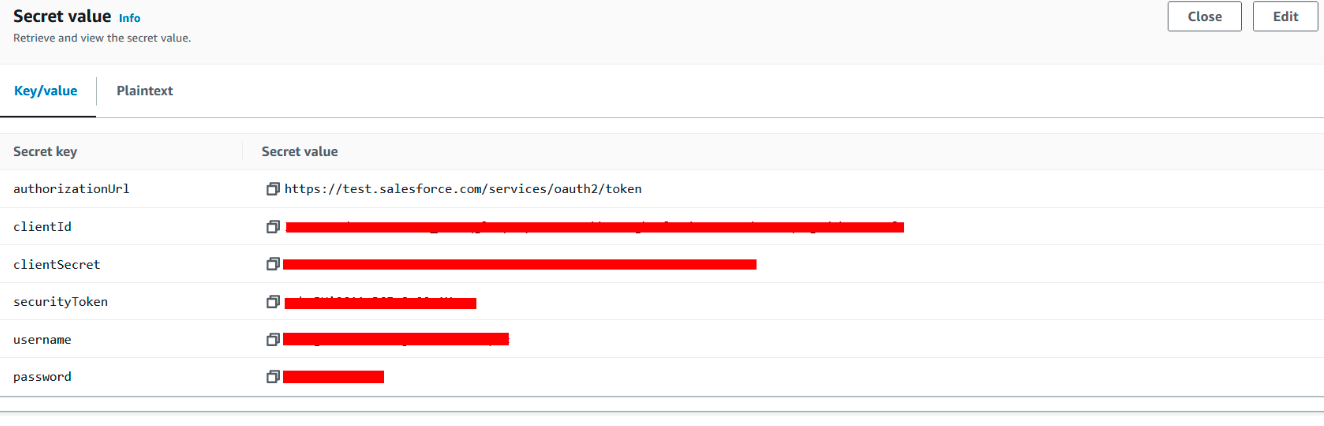
authorizationUrl(required) the authorization url for theSalesforce Connected Appthat is publicly accessible.clientId(required) the clientId of theSalesforce Connected AppclientSecret(required) the clientSecret of theSalesforce Connected AppsecurityToken(required) the securityToken of username.username(required) the username of theSalesforce Connected Apppassword(required) the password of theSalesforce Connected Appobject(required) the API Name of the Salesforce object.partitionField(optional) the field name of the Salesforce object, this field should represent the logical partition of your data.
The recommended approach to setting the connector options
AWS Secrets Manager can be used to store username, password and other sensitive information related to source connection.
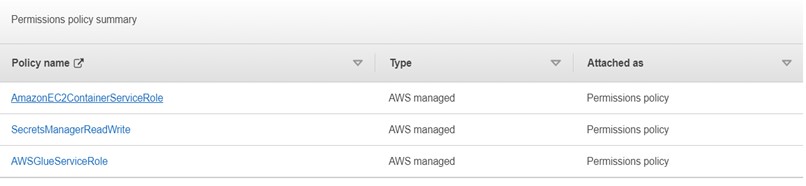
The IAM Role you will be using in the Glue Job should contain the following policies
AWS Glue Service - To run the job.
Amazon EC2 Container Registry - To access AWS Container Registry.
Secrets Manager (optional) - If you use AWS Secrets Manager for connection options.
Using the Salesforce Connector for AWS Glue
Here are the setup steps for configuring the Salesforce Connector:
Setup IAM Role for policies and secret AWS Secrets Manager
Setup Salesforce connector and a related connection on Glue Studio console.
Create a job.
Save and run the job.
Step 1: Setup IAM Role for policies and secret AWS Secrets Manager
Create role and secret:
IAM Role for policies as described in prerequisites.
2. Optional - Create secret in AWS Secrets Manager for the connector options described in prerequisites.
Step 2: Setup Salesforce connector and a related connection on Glue Studio console
To set up the Salesforce connector and create a connection for your job:
Please subscribe to the product from AWS Marketplace and Activate the Glue connector from AWS Glue Studio
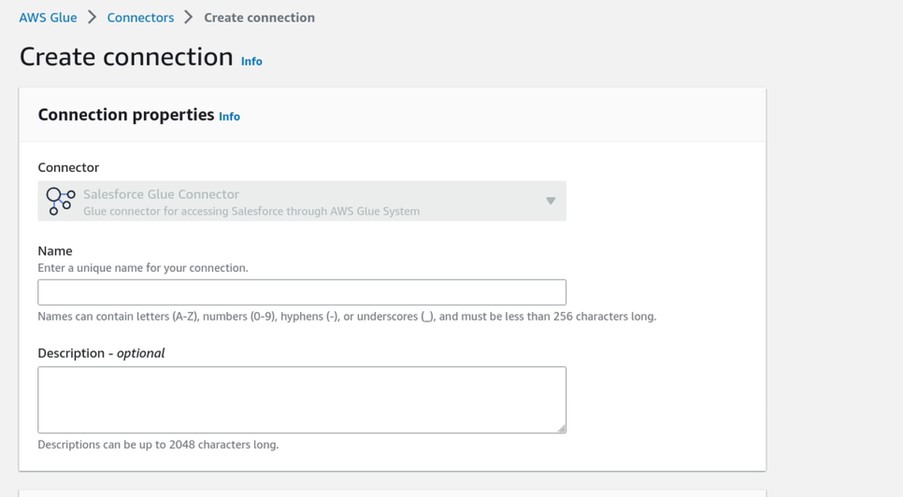
Enter your connection name and choose "Create connection and active connector". You can optionally add a description, "Connection access" and "Network options". If you have created an AWS secret with the connector options you can choose your AWS secret from the dropdown under "Connection access".
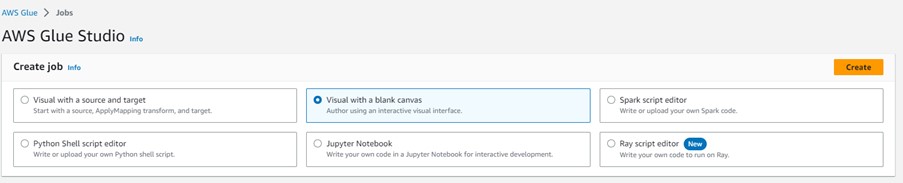
Step 3: Create a job
To create a job from your connection which is created in the previous step:
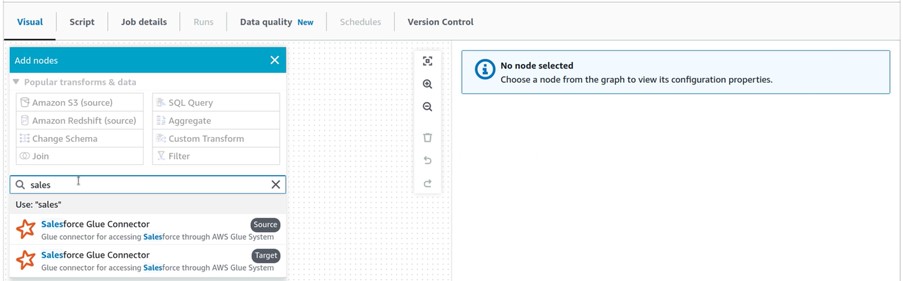
Choose the connection and "create job".
Select your created connection figure on the visual canvas.
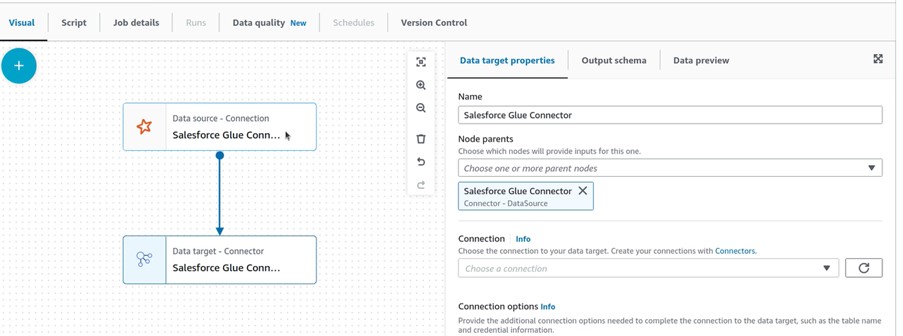
Add connection options and enter the necessary information.
Follow the earlier step (Connector options you need to set) to add the connection options
Or you can create an AWS secret with the connector options and attach with the connection as stated in the above step 2.1.
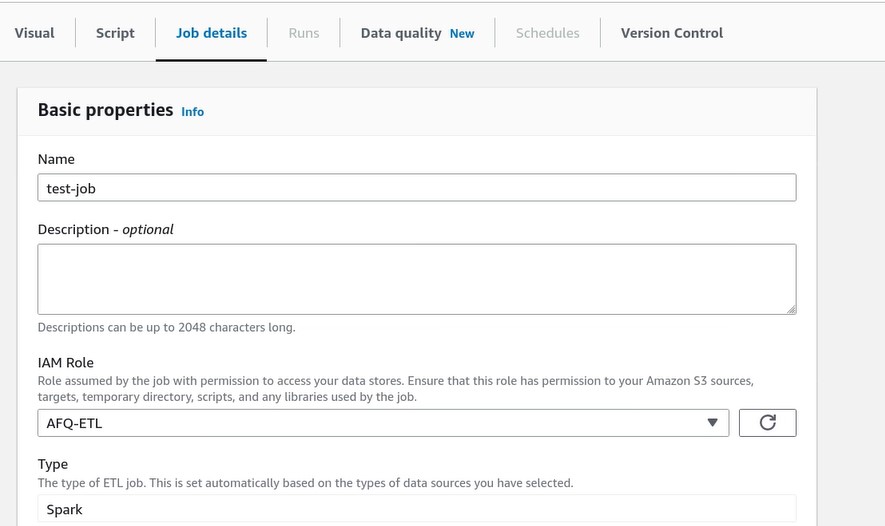
Enter the job name, choose IAM Role created in step 1, and other properties in the "Job details" tab, and Choose "Save"
Step 4: Save and run the job
Run the job after filling in all parameters and creating the connector job.
Conclusion
From the above details, you learned how to configure and use Glue connector for Salesforce CRM. Now you don’t need to wait for all the data in your Salesforce CRM to be used for ETL Jobs and maintained on a day-to-day basis to run your Jobs.
For more information, reach out to [email protected]


